How Do I Install A Trulifi 6002 LiFi Kit?
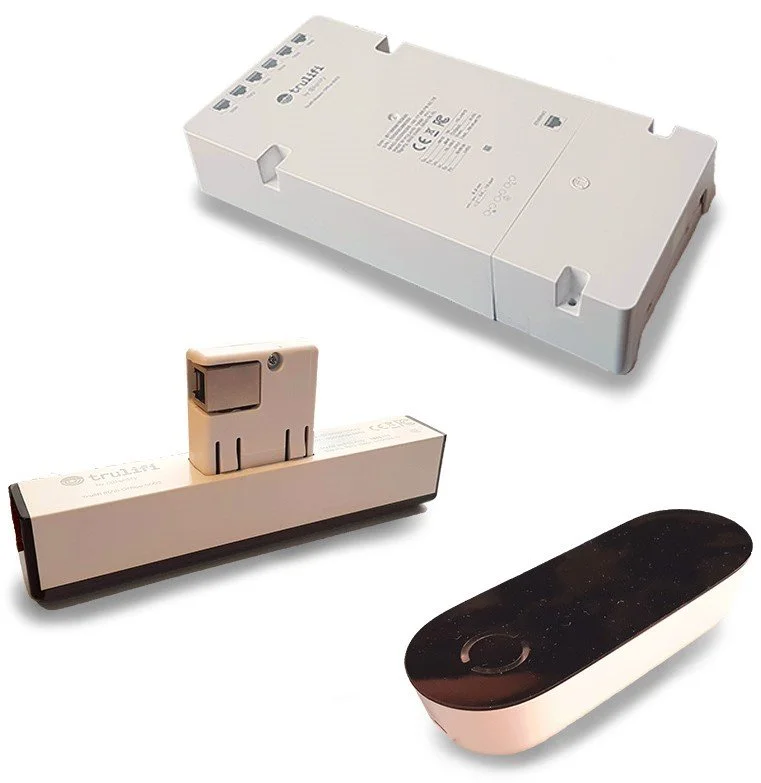
Credit to Signify - Trulifi 6002 series
Well, this can be done in few easy steps. Welcome back to LiFi Tech News. Today, we're diving into the physical setup of the Trulifi 6002 Starter Kit by Signify.
Signify designed this system to deliver highly reliable, secure, two-way wireless communication at speeds up to 150 Mbps using light waves. Operating on the ITU G.9991 LiFi standard, it features AES 128-bit encryption and seamless handoffs between light points, making it an ideal enterprise solution for offices, hospitals, and high-security environments.
Before you begin, verify that you have all the primary components from your starter kit box.
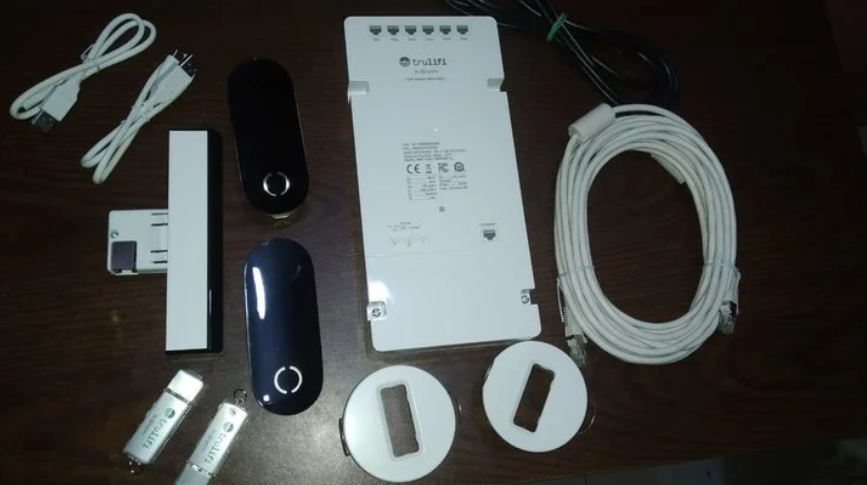
Credit to LiFi Tech News - TRULIFI 6002.1 Box Contents
Installation Guide
This installation guide has been written in the context of installing a Trulifi 6002 system in a residential room or an office room. N.B. This installation guide is for the Trulifi 6002.1 and 6002.2 versions. Follow the following steps to get your optical network up and running:
1) Install the Trulifi 6002 Access Point
Begin by mounting the Trulifi Access Point 6002.1. Connect it to your local network using an RJ45 Ethernet cable (Cat 5/5E/6). Once networked, connect it to your mains power (100-240 V) using the provided power cable. This unit acts as the brain of the system, capable of supporting up to 16 users.
2) Install the 6002 Transceiver IR/IR
Mount the transceiver using the provided ceiling holder (or retrofit it directly into compatible Philips luminaires). Connect the transceiver to the Access Point using the included 7-meter RJ12 SFTP cable. You don't need a separate power source for the transceiver; the Access Point supplies the necessary 24 V DC power directly over the RJ12 cable.
3) Install the Trulifi 6002 USB Key
Plug the USB key containing drivers for your computer to recognise the LiFi dongles. Connect the Trulifi USB Key 6002.1 to your computer using the provided USB-C cable. This key captures the optical signal and uses an infrared emitter to send data back up to the Transceiver. For optimal connection (up to 150 Mbps), keep the key within a 1.2 to 2.8-meter distance from the ceiling transceiver.
4) Upgrade the Firmware (Optional Step)
If you purchase a Trulifi network management device like the Trulifi 6800, follow the following step. Once the hardware is physically connected and your computer establishes a link, log into your Trulifi network management interface to check for firmware updates. Keeping the firmware current ensures you have the latest performance patches and security protocols.
5) Activate the Controller License Key (Optional Step)
If you are setting up a large-scale deployment across multiple access points, input your Trulifi Controller License Key into the system dashboard to unlock these enterprise management tools.
A Note on Coverage and Performance: The LiFi coverage area is a direct circle beneath the transceiver. Your connection speed and stability will be best when the USB access key is placed straight under the transceiver (radial distance 0). As you move toward the edge of the light cone, the data rates will gracefully adjust based on the distance and angle. We also found out that in some cases, the download and upload can go beyond 150 Mbps.
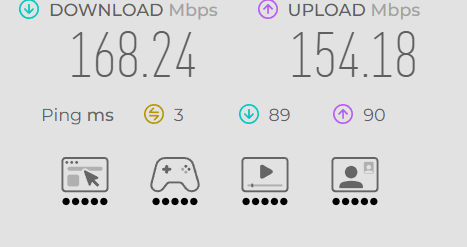
Speed test of a Trulifi 6002.1 kit
We hope this installation guide has been helpful. We will write more step by step installation guides of other relevant LiFi systems. Make sure to follow and subscribe to LiFi Tech News.
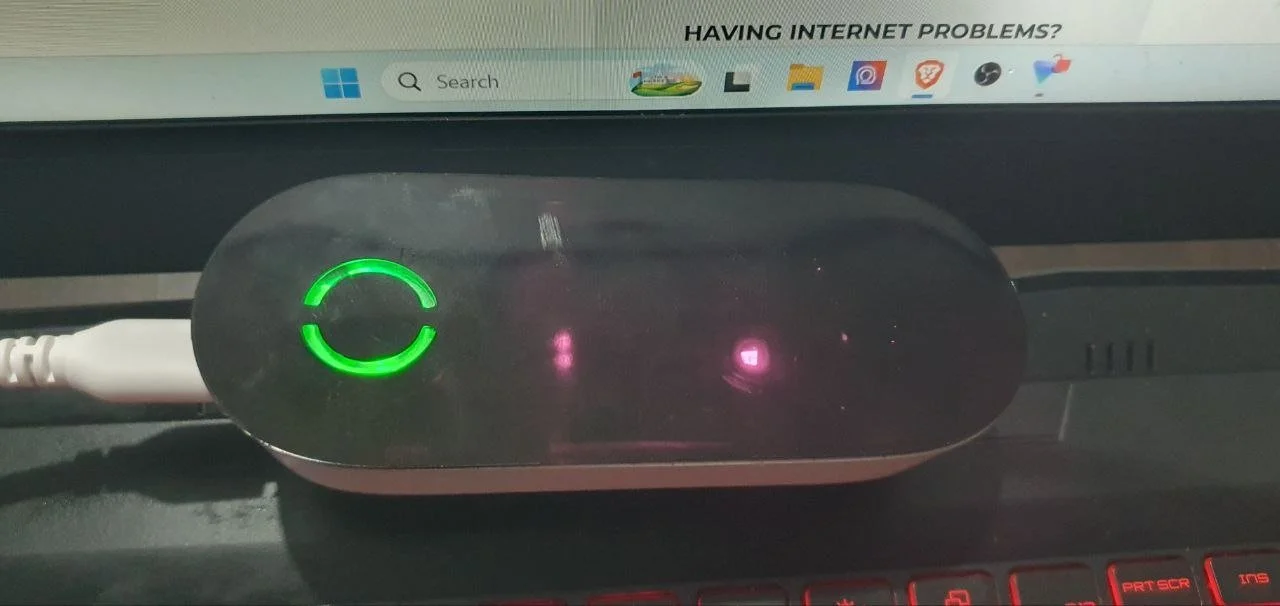
Credit to LiFi Tech News - USB C LiFi Dongle